An assessment goes through the following "life cycle" in the system:
- An assessment is ASSIGNED to a candidate.
- The candidate COMPLETES the assessment.
- The user VIEWS the assessment results report.
If, for some reason, the candidate DOES NOT COMPLETE the assessment in step 2, the assessment could be in one of the following states:
ASSIGNED
The assessment remains in the state from step 1--that is, the assessment is simply ASSIGNED to a candidate. If the candidate never takes the assessment, it will eventually expire (by default, 30 days from the assignment date). If you know that a particular assigned assessment will not be used, you can expire the unused assessment.
ACTIVATED (STARTED)
The candidate accesses but does not complete the assessment. This leaves the assessment in an ACTIVATED (STARTED) but not complete state. An assessment in this state will NEVER EXPIRE. If you need to prevent a candidate from accessing the started assessment, you will need to "Withdraw" the assessment. See Handling Started Assessments for details.
EXPIRED
Assessments that were never started will automatically expire 30 days after the assignment date. The default assessment expiration setting is 30 days. This setting can be modified within the Client Information settings for your account.* An automatic job runs nightly to expire any assessments that were assigned over 30 days ago. For example, an assessment with an assigned date of 10/03/2011 07:17 PM CDT would expire just before midnight on 11/2/2011, because 11/2 is 30 days past the assignment time, and the record became eligible for expired status at 11/02/2011 07:17 PM, but didn’t actually update until the job ran just before midnight. Assessment expiration is based on the current setting of the Assessment Expiration field within the Client Information settings (regardless of what the setting was at the time the assessment was assigned).
* Contact your Pearson account representative for help in modifying this value.
See Reclaiming Expired Inventory for more details.
If you have assigned an assessment to a candidate but the candidate does not take the assessment for some reason, you will want to reclaim the assessment and assign it to another candidate.
To do this, you will need to “Expire” the assessment:
- Click Results to access the Results pane and the Product Status Matrix.

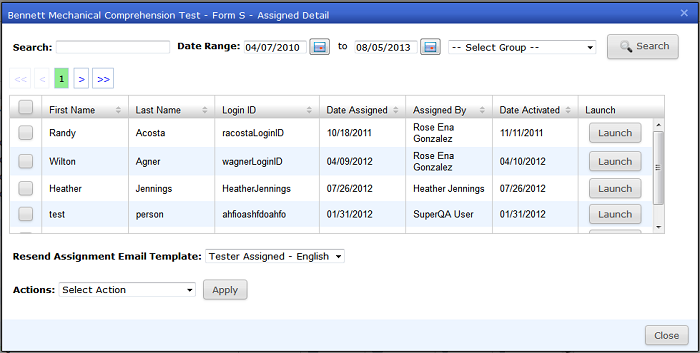
- Click the number in the “Assigned” column for the assessment you wish to expire. The Assigned Detail window will appear.
- Find the record or records in the list for the candidate(s) whose assessment(s) you wish to reclaim. Check the box to the left of their name(s).
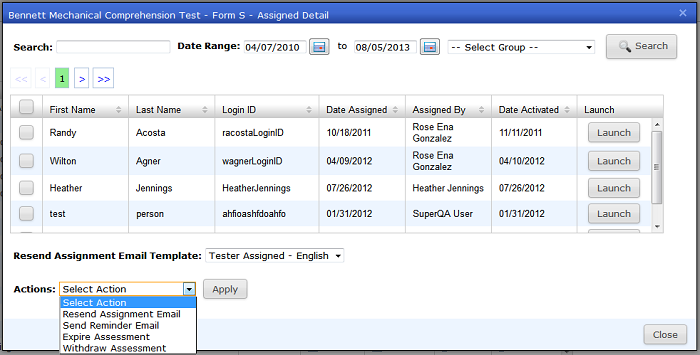
- Click the Select Action drop-down list to display the list of available actions, as shown below:

Resend Assignment Email: Resend the assignment email to the candidate using the Tester Assigned email template selected under the Resend Assignment Email Template option. The assignment email usually contains a link to the assessment so the candidate may re-access the assessment in order to complete it. See Email Templates for more details on using email templates.
Send Reminder Email: Send the reminder email (using the Tester Assigned Reminder email template) to the candidate. This email also typically contains a link to the assessment.
NOTE: The display of the Resend Assignment Email and Send Reminder Email options is based on your Client settings. If you do not see these options and you would like to, contact your Pearson account representative.
Expire Assessment: Use this option to expire the assessment so it can be reclaimed and assigned to another candidate (see step 5 below).
Withdraw Assessment: Remove the assessment from the Assigned Detail window and place it in the Withdrawn list.This action also disables access to the product from any assessment links given to the candidate. This option is only available for assessments that have already been started (have a date listed in the Date Activated column). See Handling Started Assessments below.
- Select “Expire Assessment” from the Select Action drop-down menu to expire the assessment. Then click the Apply button. You will see a prompt asking you to confirm the expire operation. Click OK to confirm the action. You will then see a notice confirming the expiration. Click OK again. The record(s) will be removed from the Assigned Detail window and placed into Expired status.
NOTE: The “Expire Assessment” option will not be available if the assessment has been activated (started). You can tell an assessment has been started if a date appears in the “Date Activated” column on the Assigned Detail window. See Handling Started Assessments below.
- Click the Close button to return to the Product Status Matrix. You will see the number under the "Assigned" column reduced and the number under the "Expired" column increased by the number of assessments expired.
To reclaim the inventory that has been expired, see Reclaiming Expired Inventory.
If a candidate accesses but does not complete an assessment, the assessment is left in a started but not completed state. Assessments that have already been started are spoiled inventory and should not be used for a different candidate. Demographics and question item data may have already been filled in and the timer may have been started on timed assessments. In a started state, you will see a value in the Date Activated column in the Assigned Detail screen.
Additionally, An assessment that has been started will NEVER EXPIRE. If you need to prevent a candidate from accessing the started assessment, you will need to "Withdraw" the assessment using the "Withdraw Assessment" option from the Actions menu in the Assigned Detail window. See the information below about the options on the Actions menu and withdrawing an assessment.
To view started assessments:
- Click the Results tab to bring up the Product Status Matrix. Click the number in the “Assigned” column for the assessment you wish to view.

- The Assigned Detail window will appear (see example below).

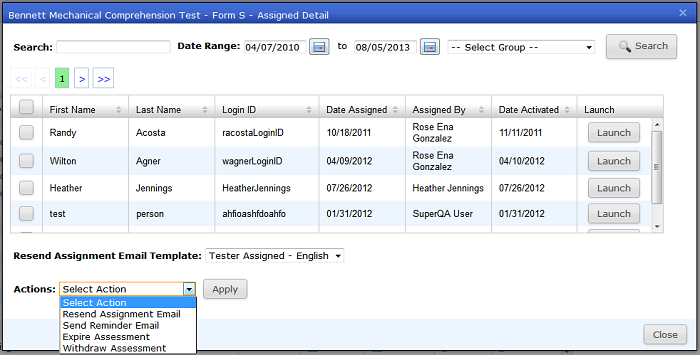
- Started assessments will have a value in the Date Activated column. The Select Action menu has the following options:

Resend Assignment Email: Resend the assignment email to the candidate using the Tester Assigned email template selected under the Resend Assignment Email Template option. The assignment email usually contains a link to the assessment so the candidate may re-access the assessment in order to complete it. See Email Templates for more details on using email templates.
Send Reminder Email: Send the reminder email (using the Tester Assigned Reminder email template) to the candidate. This email also typically contains a link to the assessment.
Expire Assessment: Use this option to expire the assessment so it can be reclaimed and assigned to another candidate. This option is only available for assessments that have NOT been started (have no date in the Date Activated column).
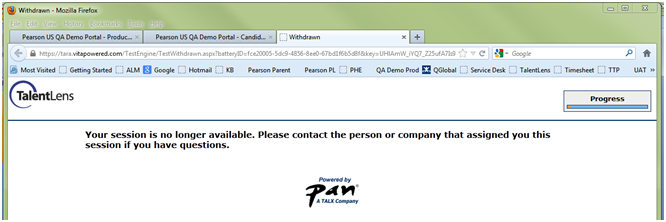
Withdraw Assessment: Remove the assessment from the Assigned Detail window and place it in the Withdrawn list.This action also disables access to the product from any assessment links given to the candidate. If the candidate accesses their assessment link after the assessment has been withdrawn, they will receive the following message:

- Click the Close button to return to the Product Status Matrix. If you have withdrawn any assessments, you will see the number under the "Assigned" column reduced and the number under the "Withdrawn" column increased by the number of assessments withdrawn.
Viewing Withdrawn Assessments
To access a list of withdrawn assessments, click the Results tab to access the Product Status Matrix. Then click on the number in the "Withdrawn" column to access the Withdrawn Detail window (see example below).

There is no further action that can be performed with a withdrawn assessment.


