Users with a professional-level account will have access to items on the Reports panel. This article describes the Assessment - Candidate Status report.
Click here to see an example report.
The Candidate Status report displays the status of a candidate or group of candidates. You can pull the list of candidates for the report by any of the following:
- assigned date, activation date or completed date
- candidate name
- candidate email address
- candidate login ID
- Group name
For each candidate, the report will display their assessments based on assigned, activation or completed date and the status of each assessment (Assigned, In Progress, Completed and Scored, Expired, Withdrawn) along with the assign date and additional date information, if applicable. If the assessment was started, the start date is filled in; if the assessment was completed, the completion date is displayed. If the assessment has not be activated (started) or completed, these date fields will be blank in the report.
To run the report:
- Go to the Reports panel.
- Report Type should already be set to "Testing Results."
- Under Report select "Assessment - Candidate Status." You will see the following options:
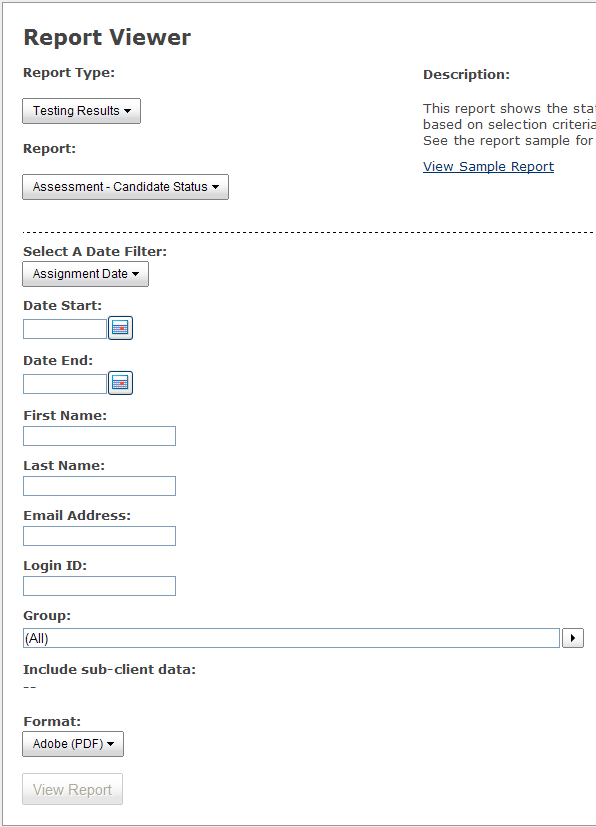
- The Date Filter can be set to Assignment Date, Activation Date or Completed Date:
| Assignment Date |
The date the assessment was assigned to the candidate. |
| Activation Date |
The date the candidate clicked the link to start the assessment (or in a proctored setting, the assessment was launched by the administrator), whether or not the candidate actually began taking the assessment. That is, the Activation Date is set even if the candidate simply filled in any demographics and viewed the instructions, but did not actually begin answering assessment questions. |
| Completed Date |
The date the assessment was completed. |
- Date Start and Date End are required fields and must be filled in.
- First Name, Last Name, Email Address, Login ID are optional and can be left blank. If you'd like to search for a specific candidate, fill in the applicable information.
- Use the drop-down list under Group to select candidates who are members of a specific Group.
- Indicate Yes or No for Include sub-client data. This specifies whether or not candidates from child client accounts are included in the report.
- Under Format specify one of the following:
- Adobe (PDF)
- Web Archive (MHTML)
- Excel
- Comma-Separated Values (CSV)
- Image (TIFF)
- Image (GIF)
- HTML 4.0
- XML
The recommended format type is Excel.
- Click View Report to display the report. The View Report button will be grayed out if there is no data within the criteria you have selected. For example, if there are no records in the date range you have specified, the View Report button will not be available. Pop-ups must be enabled in your browser to use this function.
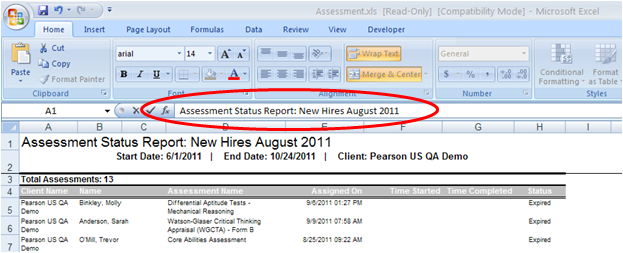
Hint: Inserting the Group Name in the Excel Format Report
When you run a report for a specific Group using the Excel format, you can place the Group Name into the title bar of the report. When the report opens in Microsoft Excel, simply place your cursor after the words "Assessment Status Report" in the cell editing area (see circled area in the screen capture below). Then type or paste in the name of the Group for which you ran the report. In the example below, the report was run for a Group named "New Hires August 2011."