To import or upload candidates from a text file:
- Prepare the CSV (comma separated value) text file.
- Upload the candidates.
See the topics below for help in completing these tasks. Please note there is a 250 candidate limit for uploads.
To upload candidates from a file, you must first create a file containing the candidates you wish to upload. The file should be a comma separated value (CSV) file. This file can be created using Microsoft Excel. To create the CSV file:
- Create a file formatted as shown below:
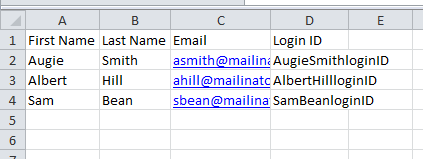
The file MUST have the following fields as line 1 (header):
First Name
Last Name
Email
Login ID
If you have more than 15 candidates, see Error Uploading Candidates.
- Use the Save As function from the File menu in Microsoft Excel. Under "Save as type," select "CSV (Comma delimited)."
You can upload a maximum of 5000 candidates at once.
- Click Assign | Upload Candidates. You will see the following page:
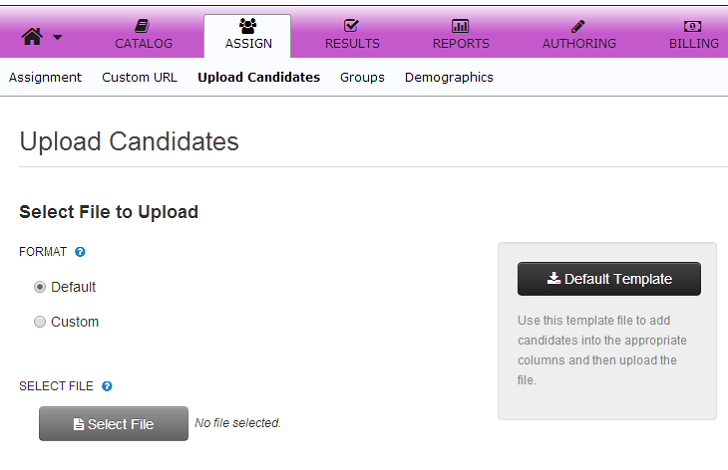
- Select Default if you've formatted your file using the Default Template. Select Custom to map the fields from your CSV file if they do not match those specified in the Default Template.
- Click the Select File button to locate the file on your hard drive. Then click the Continue button.
- If you selected the Default format, skip this step and go to step 5. If you selected Custom format, you will see a screen similar to the following, allowing you to map the required fields to fields from your import file:
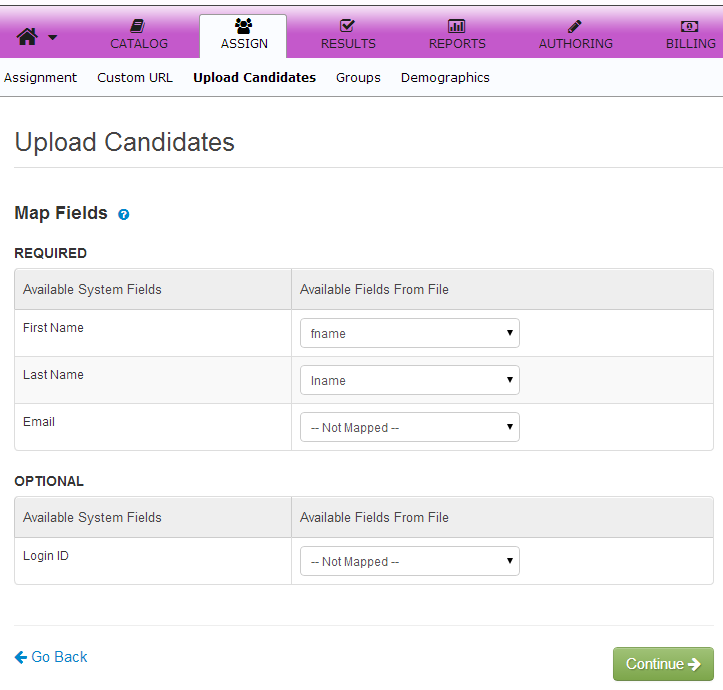
Notice the fields indicating "Not Mapped". Any REQUIRED fields must be mapped to a field available in the import file before you can continue. Once you have mapped all the REQUIRED fields and any OPTIONAL fields you would also like to map, click Continue.
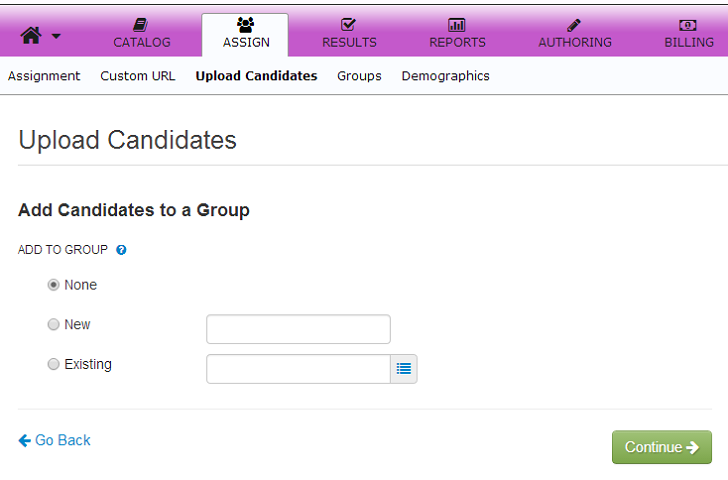
- You will see the following page that allows you to optionally assign the uploaded candidates into a group for later use in assigning or viewing results for these candidates. Once you have filled in any desired Group information, click Continue.
- A page similar to the following will be displayed allowing you to review the selections you have made for the upload. If you use system-generated Login ID's, the Login ID field may be left blank.
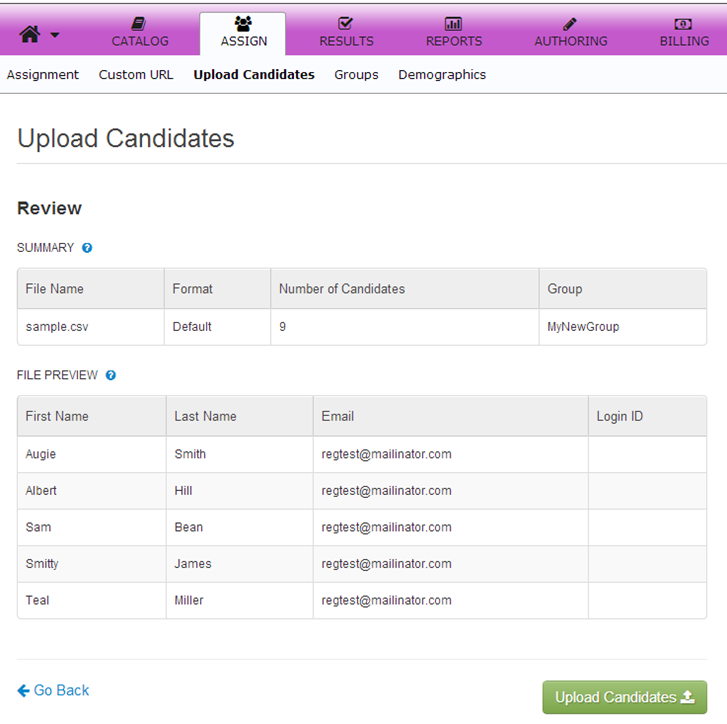
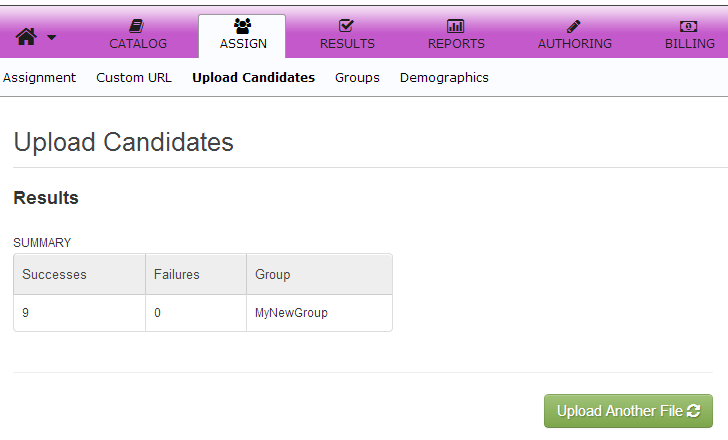
- Click the Upload Candidates button to upload this group of candidates.A page similar to the following will be displayed.